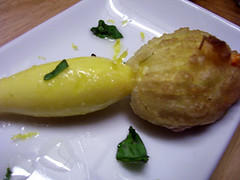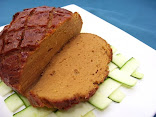
These tree-shaped pastries are easy and fun to make, and inspired by a post that has stuck in my head for a couple of years from VeganLovlie. She used homemade pie crust pastry, but I went the quick route and used store-bought puff pastry. Each package makes four 4-6" trees (more if you try making smaller ones), and you can fill them with anything you like- savory or sweet.
Start with your sheet of puff pastry and cut in half. Then make two 1 to 1 1/2" cuts on the middle bottom for your tree trunk. Then carefully score the outline of the tree (triangle) without cutting all the way through. Trim the upper corners so you don't have too much dough to work with (use scraps for something else), then trim the bottom corners too. Lastly, cut strips on either side of the tree- not an exact science, but about 1/2" each, stopping at your scored guide lines.
I added a layer of Tofutti cream cheese mixed with garlic salt, dried basil, and cracked black pepper, to make an herb spread.
Then I added a layer of a saute- spinach, onions, sun-dried tomatoes, and roasted pine nuts- sauteed in a little olive oil and seasoned with salt and pepper. Make sure this mixture is not wet!
Starting from the top, simply fold each strip towards the center, overlapping one side, then the other side. Wrap firmly over your filling.
When you get to the last two side strips, fold up the two bottom corners. You may want to trim these a bit if it seems like too much dough. Then go ahead and finish the two remaining side strips, tucking the last one under a bit.
Place it on a prepared baking sheet (I used parchment paper), and bake at 400 degrees for about 10 minutes. Then broil the tops for a minute or two- watch it until it turns golden and puffs up. Let them cool a bit before picking them up with your hands.
Showing posts with label appetizers. Show all posts
Dec 15, 2011
Jul 31, 2011
FoodBuzz 24 x 24: Incredible Edible Bowls
Put away those utensils and leave your bowls in the cupboard! If you ever wished you could
lick your bowl clean, well... here's your chance to EAT it! Martha Stewart wouldn't raise an eyebrow on these babies.
Cucumber Sailboats
Tip: Make sure to cut the bottoms so they'll stand up.
Tip#2: Nothing better than fresh fried tortilla chip sails! Fry up scraps for tortilla soup or add
to salads. These were filled with guacamole and accented with red bell pepper.
Carrot Straws & Apple or Bell Pepper Cups
These are the most fun, child-like things you'll ever see (which is why they make me happy)! I
think it's healthy for adults to regress a bit, but you can always say you're making them for
your kids (I won't tell). Of course, if you don't have any kids in your life, you'll need to have the maturity to handle people teasing you a bit. My advice? Start drinking through a carrot straw, and see just how much they want one too!
To Make A Carrot Straw:
You'll need a nice straight carrot that's at least 1/2 - 3/4" thick at the top, a standard vegetable
peeler, a sharp knife, and a 1/8" flathead screwdriver that's at least 4" long (it's skinnier than a
standard one, which reduces the chance of cracking).
Step 1: Cut the top and narrow end off the carrot, leaving a 3-4" long section, unpeeled.
Step 2: Make sure that both ends are level by standing them up on your cutting board- trim as
needed.
Step 3: Hold the wide end as the base, while you twist the screwdriver into the top end of the
carrot, making sure to keep it straight and centered.
Step 4: When you're about half way through, turn upside down and twist from the fat end. It
should easily poke through, and you can push out any carrot bits left. Run water through to
make sure.
Step 5: Now peel your carrot and from the fat end, start to whittle away until you have a
straight narrowed-down straw, using the hole as your guide. Don't whittle too much!
Tip: Make sure to thoroughly clean your screwdriver before using.
Bell Pepper Cups
Ok, I'll try and be an adult now... Bloody Mary, anyone?
Potato Chip Flower Bowls
Be careful- these are as addictive as you'd think!
Start with a long wooden skewer, and use a small cube of potato as the base. Cut a small
potato (1 1/2 - 2" in diameter) into thin slices- a mandolin works best for this. Cut a slit about halfway into your "petal." Cross the two corners as shown to create a petal, then skewer. Repeat a couple more times, until you get...
... this. Then carefully deep fry them by holding the opposite end of the skewer and
submerging the flower in the hot oil until golden and crisp.
Add a little spoonful of Tofutti cream cheese, mixed with chives, garlic powder, and salt into
the center of the flower, then skewer a small cherry tomato or whatever you like to finish.
These are perfect little bites. I also made yam flowers (right).
Potpie Pastry Spoons
You can go crazy with these- savory or sweet.
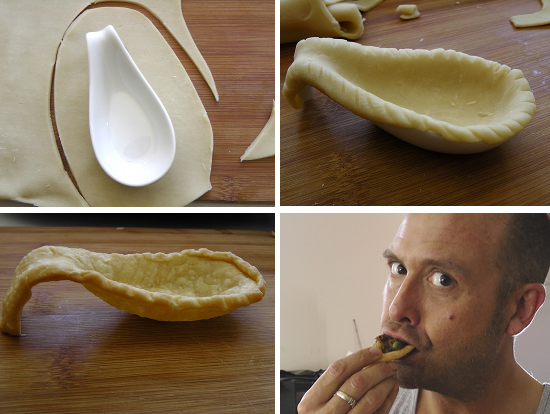
Use ceramic spoons, bake at 350 F for about 15 minutes or until golden. Let cool a bit before
trying to remove the spoon. I filled mine with carrots, pees, leeks, and store-bought sausage,
sauteed in gravy- everything finely diced. Mark sampled... "Yummy!"
Candied Orange Bowls
I used the technique found at Food2 to make candied orange halves, which I would later fill
with a roasted almond date crust and a no-bake cheesecake. Everything went well together-
the sweet tanginess of the candied orange, the nutty sweetness of the inner crust, and the rich
creaminess of the filling.
Use organic oranges for this. Cut in
half from stem to bottom, removing any stems. With a small paring knife, cut around the fruit like you would a grapefruit. Using a spoon or fingers, carefully dig out the fruit over a bowl to catch the juice. Scrape out any re- maining fruit, leaving a thin layer of pith and the skin. You'll need a large pot, plus: 6 small oranges, less if they're big 4 1/2 C. granulated sugar 1 1/2 C. water
First, blanch them by putting them into the pot with enough water to cover. Bring to a boil, then pour off the water. Repeat this two more times (total of three times) to get rid of a lot of the bitterness from the pith.
Now mix together the sugar and 1 1/2 cups of water in the big pot, and bring to a simmer. Let simmer for 8-10 minutes, or until the temperature reaches 235 degrees F (soft ball stage). Do not stir. It should be thick and syrupy and slightly brown.
Carefully add the orange cups, and coat each one gently with tongs- too much agitation will cause sugar crystals and you don't want that!
Let them simmer for about 45 minutes or until they look translucent. Drain each one, and lay on parchment paper to dry- may take 5 hours or more.
Candied Orange Cheesecake Bites
Slice it up like an orange, and serve! Tip: Use a sharp knife, and clean it after every cut.
|
Labels:
appetizers,
EDIBLE BOWLS,
foodbuzz24-24-24
Jun 9, 2011
DJ Party! Electrolux "Are You Party Ready?" Event
Scenario: I'm at home in my jammies, watching pre-recorded episodes of reality shows I'd rather not disclose, fast becoming one with the couch, and there's a knock at my door. Jack, the Jack Russell Terrorist, flies off the couch and with as much macho as his little body can muster, yaps a series of annoyingly high-pitched warning barks at the unseen threat on the other side. After I clumsily pull the little monster away from his inscrutable prey, I open the door to find my good friend and his family, who thought they'd drop by on their way to Lake Tahoe. Jack does a 180 and greets them warmly. I do the same, but in the back of my mind, I'm wondering...
Here's what I came up with...
Tip #1: Feed your guests in a fun, interactive, non-boring way.
The most fun food I've ever had at a party, was a make-your-own-pita-pocket bar. When you're involved in making the food (or assembling it)... it just tastes better!
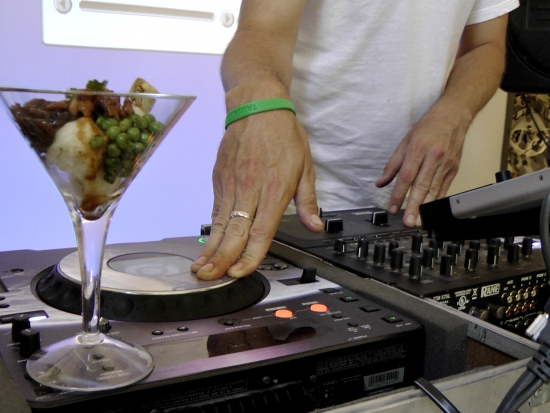
Next, serve with complimentary foods. I made vegan sausage skewers, marinated sauteed tempeh, sauteed mushrooms, peas, and artichokes, caramelized onions, fresh cilantro, and homemade garlic aioli and terriyaki sauce. All of these were easy, flavorful, and quick to make.
Tip #2: (This is the hard one) Keep good stuff in your freezer for unexpected occasions.
Oh, who am I kidding? Things fly out of my freezer like tweets about lying congressmen. But even though I haven't been following this tip, I think I should start... I really really do. It cuts down on time- the most precious thing you'll need when entertaining!
For this particular event, I played around with different things that would be good to keep in my freezer, and froze some things ahead of time to test my theories out. Yeah, it's sort of cheating, but what the hell?
For my Appetizer Cocktails, I used frozen peas, frozen leftover rice (above), frozen artichoke hearts from Trader Joe's, and frozen veggie egg rolls from Costco (yeah, their vegan!). I also made some mini cheesecakes from my previous recipe, and froze/ thawed them. Excellent.
Tip #3: For informal parties, always serve things that taste great at room temperature.
For the Appetizer Bar, I served things that were quick to make, as well as tasty after they cooled down to room temp. Mark showed me how to boil the potatoes, then shocked in ice water. It turns out that frying or roasting them would result in dry potatoes after they cooled down. This way, they stayed creamy and delicious! I also served mushrooms sauteed in olive oil and a little Earth Balance non-hydrogenated margarine (a.k.a. vegan butter), browned sausage skewered with fresh tomatoes, sauteed tempeh that had been marinating in the fridge overnight, and carmelized onions. Most things took only a few minutes in a hot skillet, and stayed tasty throughout the event. Others could be made ahead of time, and stored in the fridge to be brought out later.
Tip #4: Make use of what you got... as well as your brain.
... the right side of your brain, that is. Be creative, and your guests will appreciate it!
If you'd like to visit the Electrolux site, they are giving away some cool appliances right now and donating to charity for all those who participate.
Am I Party Ready?
As is the important question posed to me and a bunch of other bloggers, who have been presented by FoodBuzz and Electrolux, the challenge of offering impromptu party tips.
Here's what I came up with...
Tip #1: Feed your guests in a fun, interactive, non-boring way.
The most fun food I've ever had at a party, was a make-your-own-pita-pocket bar. When you're involved in making the food (or assembling it)... it just tastes better!
Appetizer Cocktails
I originally just put them into a deep fryer until crisp on the outside. They were delicious, but turned hard after cooling down. I remedied this by dunking them into a tempura batter (rice flour, cold seltzer water, pinch of salt) before frying. They kept a good texture, and stayed white- good for the ice cube theme! Do make sure to use sticky medium or short grain rice.This is a slightly more elegant D.I.Y. food bar, that can be done with any assortment of glassware that seems appropriate to you, and some cute little shrimp forks (forking cute) that I picked up at World Market.
This can be done with a variety of different ingredients. You can use potatoes, pasta, rice, bread, etc. as the base. I used baby potatoes, and deep fried rice balls (I like to call them "rice cubes"). I had fun with the theme, and served them in my ice cube bucket.
![]() |
| "Rice Cubes" shaped, frozen, battered, and fried. |
Making these rice cubes is a great way to save and use your leftover rice. My family eats a LOT of rice, and when there's leftovers, I roll them up into balls and stick them in my freezer. Just use and reuse a small square of plastic wrap to shape the balls and place in a single layer into a zip lock freezer bag.
Next, serve with complimentary foods. I made vegan sausage skewers, marinated sauteed tempeh, sauteed mushrooms, peas, and artichokes, caramelized onions, fresh cilantro, and homemade garlic aioli and terriyaki sauce. All of these were easy, flavorful, and quick to make.
Tip #2: (This is the hard one) Keep good stuff in your freezer for unexpected occasions.
![]() |
| Mini Cheesecakes... make 'em and freeze 'em... then eat 'em later. |
For this particular event, I played around with different things that would be good to keep in my freezer, and froze some things ahead of time to test my theories out. Yeah, it's sort of cheating, but what the hell?
For my Appetizer Cocktails, I used frozen peas, frozen leftover rice (above), frozen artichoke hearts from Trader Joe's, and frozen veggie egg rolls from Costco (yeah, their vegan!). I also made some mini cheesecakes from my previous recipe, and froze/ thawed them. Excellent.
Tip #3: For informal parties, always serve things that taste great at room temperature.
| DJs helping themselves after playing a set on the decks |
| Mark shows them how it's done |
For the Appetizer Bar, I served things that were quick to make, as well as tasty after they cooled down to room temp. Mark showed me how to boil the potatoes, then shocked in ice water. It turns out that frying or roasting them would result in dry potatoes after they cooled down. This way, they stayed creamy and delicious! I also served mushrooms sauteed in olive oil and a little Earth Balance non-hydrogenated margarine (a.k.a. vegan butter), browned sausage skewered with fresh tomatoes, sauteed tempeh that had been marinating in the fridge overnight, and carmelized onions. Most things took only a few minutes in a hot skillet, and stayed tasty throughout the event. Others could be made ahead of time, and stored in the fridge to be brought out later.
Tip #4: Make use of what you got... as well as your brain.
... the right side of your brain, that is. Be creative, and your guests will appreciate it!
| Fruit served in my bundt pan and placed on top of our old turntable that we don't use anymore... but it still turns! |
| You got skills if you can pick up moving fruit! Our buddy Butterscotch, putting "rice cubes" in her cocktail |
| DJ Scratch Rock, rockin' Cee's Baba Ganoush Sunflower Hummus (above)... YUM! |
| Video DJing... on the ceiling!!! |
So... Are YOU party ready? What clever tips do you have?
If you'd like to visit the Electrolux site, they are giving away some cool appliances right now and donating to charity for all those who participate.
Labels:
appetizers,
Events,
Vegan
Jun 25, 2010
Curried Cauliflower Chickpea Tofu Salad...On A Chip
It's tofu salad on crack. The mashed chickpeas and cauliflower provide a rich creamy texture and flavor, and the spicy kick of curry gives it a nice twist. Serve it on a crispy pita cracker (as shown above), in a sandwich, over salad greens, or off your finger... if no one's looking.
Ingredients:
1 head of cauliflower, cut into chuncks
1/2 yellow onion, cut into thirds
2 T. olive oil15 oz. can of chickpeas (or use fresh cooked if you have)
1/4 C. minced green onions
1/4 C. Vegennaise
2 T. Hot curry paste (I used Patak's) -use more or less to your liking
1/2 package firm tofu (about 7 oz.), @ 1/2" cubed salt to taste
Spinz:
Arrange cauliflower and onions on a prepared sheet pan. Season with salt and drizzle with olive oil, then roast in a 400 degree oven for 10-15 minutes (lightly browned and fork tender). Pull out of the oven and allow to cool to room temperature.
Put the veggies and all the other ingredients except tofu and green onions into a food processor, and blend until creamy with small chunks. Transfer to a mixing bowl, and mix in the tofu and green onions. Taste and add salt if needed. Chill in the refrigerator for an hour or more.
Ingredients:
1 head of cauliflower, cut into chuncks
1/2 yellow onion, cut into thirds
2 T. olive oil15 oz. can of chickpeas (or use fresh cooked if you have)
1/4 C. minced green onions
1/4 C. Vegennaise
2 T. Hot curry paste (I used Patak's) -use more or less to your liking
1/2 package firm tofu (about 7 oz.), @ 1/2" cubed salt to taste
Spinz:
Arrange cauliflower and onions on a prepared sheet pan. Season with salt and drizzle with olive oil, then roast in a 400 degree oven for 10-15 minutes (lightly browned and fork tender). Pull out of the oven and allow to cool to room temperature.
Put the veggies and all the other ingredients except tofu and green onions into a food processor, and blend until creamy with small chunks. Transfer to a mixing bowl, and mix in the tofu and green onions. Taste and add salt if needed. Chill in the refrigerator for an hour or more.
Labels:
appetizers,
cauliflower,
Chickpeas,
salads,
Tofu
Jun 4, 2010
Baby Zucchini with Stuffed Blossoms
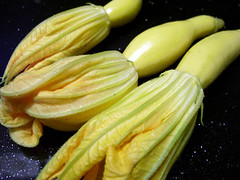
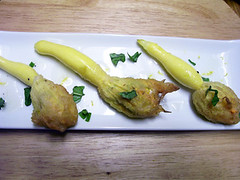
Tender baby zucchini, left raw, with their attached blossoms stuffed, battered, and quickly fried until crisp. Then drizzled lightly with garlic lemon oil and fresh basil. This was an interesting finger food, as the first question on everyone's mind was: "How are you supposed to eat this?"
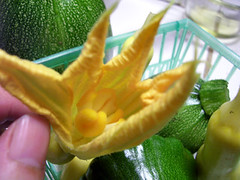
First, I removed the stamens by pinching with my fingers. Then I cleaned them gently with a damp paper towel to remove any soil or little critters that might be lurking in there.
I then carefully stuffed each blossom with a mixture of extra firm silken tofu, Tofutti cream cheese, fresh corn, fresh basil, garlic powder, dried onion flakes, and salt & pepper.
The batter was a very simple tempura made with flour, cold water, a pinch of salt, and pinch of baking powder.
The lemon oil was made with extra virgin olive oil, lemon juice, water, lemon zest, garlic powder, agave nectar, salt, and pepper. I didn't do any measuring of ingredients this time, since I was whipping them up like a storm, but these are easy to throw together and adjust to taste.
Here is the approximate quantities:
Filling (this makes more than enough for three blossoms- more like 5-6):
1/4 C. extra firm silken tofu (I used Mori-Nu)
1 T. plain Tofutti cream cheese
3 T. fresh corn, or thawed frozen corn
1/2 tsp. lemon juice
1 tsp. grated lemon zest
1/8 tsp. garlic powder
salt & pepper to taste
Tempura Batter:
1/2 C. all purpose flour
1/8 tsp. salt
1/8 tsp. baking powder.
Add 2 T. cold water, then mix and add a little more at a time until you get the consistency of pancake batter.
Lemon Oil:
1 T. extra virgin olive oil
2 tsp. lemon juice
1 tsp. water
1/2 tsp. agave nectar
1/2 tsp. lemon zest
salt & pepper to taste
Spinz:
Mash all ingredients for the filling together and spoon carefully into each blossom. Fold the petals around the filling, tucking the tops of the petals down over one another. Secure with toothpicks as needed. With tongs, hold the zucchini securely and dip the stuffed blossoms in the tempura batter, being careful not to batter the zucchinis, then into the fryer. Fry for 30 seconds or so (it's very quick) until golden. Remove to a lined plate to drain. Arrange on a serving dish and whisk together, then lightly drizzle the lemon oil with a spoon. Sprinkle fresh chopped basil, and sprinkle zucchinis with a little extra salt.
So... the consensus on how to eat: Hold the zucchini part and eat the warm crispy rich blossom first, then follow with the tender raw zucchini. SO GOOD! Wish I had more than three. This would be cool to serve as an appetizer at our restaurant, but only if we had a killer zucchini garden!
Oh, and I still need TESTERS, if anyone is interested for testing recipes for our menu.
Labels:
appetizers,
zucchini
Mar 17, 2009
Brown Rice Sushi and Deep Fried Pickles
Yes, this is a strange meal for St. Patty's Day... but I've just never been able to get into this holiday. I've never had Irish stew or corned beef and cabbage (although some of the recent vegan posts do look quite appealing). The only memory I have is of getting pinched in elementary school for not wearing green! Not that I've been scarred or anything (eh-hem!), but aren't those little leprechauns kinda scary, like clowns? Who here was(is) afraid of Ronald McDonald? Well, that's another story...I do, however enjoy green foods- as long as it's not from an artificial dye #5 or ground up beetles, or some unknown chemical process!
So, here is my contribution- that has nothing to do with St. Patrick, except for the Luck 'o the Irish green. I'm not sure that fried pickles goes with sushi, but hey- it's California and we're crazy like that. I've been told that avocados are not a traditional sushi ingredient, but I can't think a good vegan sushi roll without it! Yay for the California Roll!
I made three variations of sushi. The one shown above is an "inside out roll" with the nori on the inside and the rice and avocado on the outside. The brown rice (actually a mix of 1/3 quinoa and 2/3 brown rice) was made a bit stickier by adding a bit more water in the rice steamer. How much? My guesstimate is about 1/2 cup more than usual. It is filled with a spicy chickpea "tuna" mixture and pea shoots.
NOTE: It helps to have a good sharp, finely serrated knife (which I didn't have)! To help out my lack of tools, clear plastic wrap was my savior both in rolling it and holding the roll together while I cut it... a trick taught to me by my friend who is a sushi chef.
The above picture is my nigiri "seatbelt" sushi, as we call it. This is an easy alternative to those who are sushi-roll challenged. The hard part is making sure that the rice is packed firm so it won't fall apart when picked up. I made this one with short grain white rice. NOTE: Make sure your hands are wet when handling sticky rice... no explanation needed.To make this, simply make an oblong ball of rice in your hands by holding and shaping the rice in one hand, and compressing the rice with the other hand. Layer seasoned baked tofu (or tofu of choice- I made a teriyaki marinade and sauce) and a thin slice of avocado. Cut roasted nori into 1/2"-1" strips and wrap with the seam side down. I topped mine with some roasted white sesame seeds and also drizzled some home made teriyaki sauce.
Lastly, this was my attempt at a hand roll variation with the spicy chickpea "tuna." I started with half a sheet of roasted nori, and spread a layer of sushi rice and chickpea mixture in one of the lower corners. Then, I just rolled it into a cone shape and topped with a little more of the mixture, some black sesame seeds, and pea shoots. This would be great with cucumber too. These were probably the easiest to make, but a little messy to eat!
And now for the Pickles! If I haven't already mentioned, Mark (my housemate) is originally from England and came over here when he was about 18. He's also owned a couple of restaurants and loves to cook. Needless to say, he makes a mean fish 'n' chips! For these babies, it was a similar batter- very light and crispy, with the use of seltzer water. Mark had picked up this HUGE can of Costco-sized sliced dill pickles, and has been promising to make these for like a year! Finally, dude! Cee said they tasted like good salt and vinegar chips, and we ate these dipped in my creamy cucumber dill sauce. This was a very non-traditional "tempura" to my sushi, but very tasty and my first time trying them! I only ate one, as I don't like to eat too many fried foods, but these can be addictive- be careful!Here are the recipes:
Sushi Rice Seasoning
- 3 T. rice vinegar
- 2 T. water
- 2 tsp. sugar
- 1/4 tsp. dark sesame oil
Baked Teriyaki Tofu & Sauce:
- 1 pkg extra firm tofu
- 1/2 C. soy sauce or tamari
- 1 C. water
- brown sugar
- 1 T. mirin (rice wine)
- orange rind of one orange
- orange juice of one orange
- few thin slices of ginger
- 2-3 T. arrowroot & a little water
Spicy Chickpea "Tuna":
- 1 15oz. can of chickpeas, drained
- 2-3 T. shredded nori
- 2 T. Vegenaise
- Siracha sauce
- squeeze of lemon
- 1 tsp. smoked paprika
Fried Pickles:
- @25oz. jar of sandwich sliced dill pickles (more or less)
- 1 C. all purpose flour + small amount to dust pickles with
- 1 C. Seltzer water
- 1 1/2 tsp. baking soda
- pinch of salt & pepper
- pinch of cayenne pepper
Labels:
appetizers,
pickles,
sushi
Subscribe to:
Posts (Atom)